Last updated November 17, 2026





Free written scope consultation - allowances, timeline, and change-order rules on paper before a single trade is scheduled
Home Remodeling Maintenance Schedule: What to Do and When
A $12 tube of caulk applied every two years around a Sunnyvale shower can prevent a $7,000 subfloor replacement. Most homeowners skip the caulk and pay for the floor. That single trade-off is a maintenance schedule in miniature: a small, timed, cheap action that stands between you and a five-figure remodeling bill. This guide maps every major home system to a specific inspection window and tells you exactly what you’re looking for. It’s built for Sunnyvale’s climate, where dry summers crack seals and wet winters push water into places you can’t see.
Styles & brands we work with
- Kitchen remodeling
- Bathroom remodeling
- Home additions & ADU
- Roofing
- Windows & doors
- Driveway & pavers
- Fence
Quick Answer
Inspect your home four times a year: plumbing and caulk in spring, roofing and drainage before the rainy season in fall, tile and grout quarterly, and cabinetry and hardware twice a year. The tasks that matter most in Sunnyvale are sealing against summer dryness and checking water intrusion before the first rain, because this climate cracks seals in July and fills them in December. Most small failures show up weeks before they get expensive; a schedule is how you catch them in that window.
Table of Contents
- Why a Maintenance Schedule Is Really a Budget Schedule
- The Seasonal Maintenance Calendar for Sunnyvale
- Plumbing and Water Seals: Your First Line of Defense
- Roofing and Drainage: What You’re Looking For
- Tile and Grout: Reading the Signs Before They Spread
- Cabinetry and Hardware: The Twice-a-Year Check
- Homeowner Checks vs. Contractor Checks
- The One-Page Printable Checklist With Pass/Fail Criteria
- Common Mistakes to Avoid
- When to Call a Professional
- Frequently Asked Questions
- The Bottom Line
Why a Maintenance Schedule Is Really a Budget Schedule
Maintenance gets billed as cosmetic work. It’s not. The purpose of a schedule is to catch failures while the repair is still measured in dollars you can put on a single credit card, not in weeks of displaced family life. Every major home system has a failure window that follows a predictable path, and the difference between a small fix and a remodeling bill is almost always timing.
Consider what a skipped check actually costs in a Sunnyvale home. A caulk joint that fails along a shower wall lets water sit against the cement board substrate (the moisture-resistant layer behind your tile). Weep holes in the tile assembly clog, moisture has nowhere to drain, and within a season or two the subfloor softens. At that point you’re not fixing the seal. You’re removing tile, cutting out flooring, and rebuilding. Through our bathroom remodeling in Sunnyvale work, the most common cause of unnecessary full-bath projects we see is a failed seal that went unread for a year.
Here’s the thing that surprises homeowners: the price of maintenance doesn’t scale. A tube of sealant and an hour of your time every two years stays flat. The repair it prevents doesn’t – it grows with every season you wait.
The comparison below is worth keeping. These are typical Sunnyvale-market ranges for the kind of repair that follows a skipped check, not the scheduled task.
- Failed shower caulk left unaddressed: subfloor and tile repair often runs $2,500 – $7,500, depending how much substrate is wet.
- Clogged or missing downspout washing out a foundation edge: drainage regrade plus footing repair typically runs $1,800 – $6,000.
- Loose toilet flange causing soft flooring around the base: flooring and subfloor replacement usually lands $900 – $3,200.
- Cracked grout in a high-traffic floor left open to water: tile reset in a 40-square-foot area often runs $600 – $1,800.
The Seasonal Maintenance Calendar for Sunnyvale
Sunnyvale’s climate is the reason a generic national schedule doesn’t fit. Summers are hot and dry enough to shrink and crack sealant; winters bring steady rain that finds every one of those cracks. That means the seal-check you do in spring is protecting you in December. The calendar below is ordered around that cycle.
Spring (March – May): Seals and Water Paths
- Walk every caulk joint in bathrooms and the kitchen sink. Look for gaps, peeling, and dark discoloration at the edges.
- Check toilet bases and supply lines for any wobble or moisture.
- Clear roof gutters and confirm downspouts carry water at least three feet from the foundation.
- Feel for moisture under sinks and around the dishwasher and washing machine connections.
Summer (June – August): Dry-Season Cracks
- This is when you’ll actually see solar-side sealant shrink and open. Check exterior caulk around windows and doors now, not in fall.
- Look at grout lines in sun-facing rooms for hairline cracks.
- Watch for any window or door that has started to stick. That’s usually a wood-frame shift, not just weather.
Fall (September – November): Before the Rain
- Re-check every exterior sealant joint. Anything you opened in summer should be cut out and resealed now.
- Inspect roof flashing, especially at chimneys, vents, and skylights.
- Confirm grading slopes away from the house and that no soil beds sit above the foundation line.
- Test that window weeps (the small drainage slots in window frames) are clear.
Winter (December – February): Watch the Water
- After the first heavy rain, walk the perimeter and look for pooling near the foundation.
- Check the attic underside for any water staining or damp wood.
- Listen for drips inside walls after storms, particularly on the upper floor.
Plumbing and Water Seals: Your First Line of Defense
Water does the most expensive damage in a home, and it almost always enters through the smallest gap. The plumbing checks that matter aren’t the ones you’d think – the pipe itself rarely fails first. The seals around the pipe do. A failed supply line you can see; a failed shower pan seal you can’t.
What to Check Every Quarter
- Sink bases and supply connections. Run your hand along the joint under each sink. Any softness in the cabinet floor means water has been sitting.
- Toilet base. A wobbling toilet almost always means a failing flange, and a failing flange means moisture under the flooring. Test by gently rocking the bowl side to side.
- Shower and tub caulk. The joint along the wall and floor should be smooth and continuous. Any gap, peel, or dark line is a fail.
- Washing machine and dishwasher hoses. Look for bulging, wear at the crimp, or a hose that has stiffened with age.
If a shower drain feels slow or gurgles, don’t wait. That’s often a sign of a partial blockage beginning to back water into the pan seal area. In Sunnyvale’s hard-water conditions, mineral buildup accelerates that process. Clearing it takes minutes; replacing a water-damaged pan takes a contractor and a permit.
The cost difference is stark. Calling a licensed plumber to reseat a fixture or re-caulk a shower typically runs $150 – $350. Rebuilding water-damaged flooring and framing underneath that same shower is a project, and it’s the kind of work we handle through general contractor services in Sunnyvale when it’s caught too late.
Roofing and Drainage: What You’re Looking For
Roof inspections are less about the shingles and more about the water path. Shingles wear predictably. Flashing fails quietly. Every penetration through your roof – chimney, vent, skylight – is a seam, and seams are where water gets in. In Sunnyvale, the combination of dry heat and winter rain expands and contracts those seams year after year until a gap appears.
A safety note before you climb anything. Most roof checking should happen from the ground or through binoculars, or from inside the attic. Steep pitches and height work cause serious falls, and we recommend a trained professional for any inspection that means getting up on the roof surface itself. What you can do safely from below matters more than you’d think.
The 4-Point Roof Check
- Attic underside. Look for water stains, damp sheathing, or daylight showing through. Any of those is a fail and worth a call.
- Gutter flow. Stand back and watch gutters during rain or with a hose. Water should move, not pool or overflow at a corner.
- Downspout discharge. Water should land at least three feet from the foundation. If it dumps against the wall, you’re feeding your foundation’s worst enemy.
- Flashing from the ground. Sight the chimney and vent edges for cracked sealant or lifted metal.
Roof micro-repairs – resealing flashing, replacing a few shingles – commonly run $300 – $900 in this market. Ignored flashing failures that reach the ceiling inside can lead to drywall, insulation, and framing repairs that run several thousand dollars before anyone looks at the roof itself.
Tile and Grout: Reading the Signs Before They Spread
Grout is not decorative. It’s the barrier that keeps water out of the substrate, and the moment it cracks or hollows, it stops doing its job. What’s dangerous is that grout failures are hard to see until the damage is behind the wall. That’s why we check for two specific things – not the vague “inspect for damage” you’ll see in most guides.
Quarterly Tile and Grout Check
- The tap test. Tap a few tiles with a coin or knuckle. A hollow, buzzing sound means the tile has come loose from the thinset (the adhesive layer). Solid tiles give a dull click. Hollow tiles are a fail on floors and in showers.
- The crack check. Get close to grout lines with a flashlight. Any crack wider than a hairline, especially near a drain or an outside wall, needs sealing or regrouting.
- The moisture look. Discolored grout or a musty smell in a bathroom or shower means water is penetrating and staying.
This matters most in shower and tub surrounds. A single hollow tile in a shower has a habit of letting water behind the wall, where it sits against the cement board until the board breaks down. Once that happens, the repair is no longer regrouting. It’s a tear-out. Regrouting a shower typically runs $400 – $1,200; rebuilding a water-damaged surround runs several times that.
The same logic applies to any tile you’re thinking of keeping on a remodel. We’ve seen plenty of Sunnyvale bathrooms where the tile itself was fine but the substrate behind it was gone. It’s a good reason to have a trained eye read the tile during any bigger project.
Cabinetry and Hardware: The Twice-a-Year Check
Cabinet failures announce themselves poorly. Hinges loosen slowly, drawers stick for a year before they bind, and no one connects a sticking drawer to the swollen cabinet box behind it. Twice a year is enough to catch the slow ones.
What to Do Each Spring and Fall
- Tighten every hinge and pull. Run a screwdriver across cabinet and drawer hardware. Loose cabinet pulls eventually strip their holes in the door material.
- Check door alignment. Look at the gaps between adjacent doors. A door that’s dropped or rubbing is nearly always a hinge adjustment, not a door replacement.
- Feel for softness under sinks. Any soft cabinet floor means water has been dripping – the same water that destroys a fine cabinet line.
- Listen for drawer drag. A drawer that shudders on its tracks has either a worn slide or a swollen box from humidity.
In our kitchen remodeling in Sunnyvale projects, we install cabinet lines like KraftMaid and Wellborn because they hold adjustment for years with routine tightening. A hardware check on those cabinets costs nothing. Replacing a cabinet run because the boxes swelled with water costs a great deal more.
Homeowner Checks vs. Contractor Checks
The distinction here saves homeowners money and keeps them safe. There are checks you can and should do yourself, and there are checks that need a trained eye, specific tools, and the willingness to open up a wall. A maintenance schedule works best when each check goes to the right person.
Homeowner-Level Checks (Look, Feel, Listen)
- Caulk joints: gap, peel, discoloration.
- Toilet base: wobble test.
- Sink cabinet floors: softness test.
- Tile: tap test and visible cracks.
- Gutters: flow from the ground.
- Drawers and cabinet doors: alignment and drag.
- Attic underside with a flashlight: stains and moisture.
Contractor-Level Checks (Need Training, Tools, or Access)
- Subfloor condition under tile: moisture meter and visual access.
- Wall cavity condition behind a shower or tub.
- Roof surface inspection, flashing resealing, and any height work.
- Foundation and drainage integrity under soil beds.
- Load-bearing wall and structural changes.
- Any repair requiring a permit.
We handle the contractor-level work through our Penhallow Remodeling Sunnyvale home page and can walk you through what falls where. Knowing the split is the whole point: you do the cheap checks often, you call for the deep ones before a small failure gets expensive.
The One-Page Printable Checklist With Pass/Fail Criteria
Here’s the framework. Copy it, print it, stick it inside a cabinet. Each item has a clear pass/fail line so you’re not guessing at “inspect for damage.” A fail means call a professional; a pass means you’re done for the quarter.
- Shower and tub caulk (quarterly). Pass: joint is continuous, smooth, and matches the original color. Fail: any gap, peel, or dark line.
- Sink base and cabinet floor (quarterly). Pass: solid to the touch, no staining. Fail: any softness or dark water line.
- Toilet base (quarterly). Pass: no movement when gently tested, no moisture. Fail: any rock or dampness.
- Tile tap test (quarterly). Pass: every tile gives a solid click. Fail: any hollow, buzzing sound in a shower or on a wet-area floor.
- Grout lines (quarterly). Pass: continuous, no cracks wider than a hairline. Fail: any crack near a drain or outside wall, or discolored grout.
- Gutter flow (spring and fall). Pass: water moves freely and discharges 3+ feet from the foundation. Fail: pooling, overflow, or discharge against the house.
- Attic underside (fall). Pass: no stains, no dampness, no daylight. Fail: any of those.
- Cabinet hardware (spring and fall). Pass: all hinges and pulls tight, doors aligned, drawers open smoothly. Fail: any loose hardware, dropped door, or dragging drawer.
- Exterior sealant (summer and fall). Pass: all joints intact around windows and doors. Fail: any shrinkage, cracking, or gap.
- Drainage perimeter (after first heavy rain). Pass: no pooling near the foundation. Fail: standing water or soil resting against the foundation line.
Common Mistakes to Avoid
- Caulking over a wet or dirty joint. New sealant won’t bond to a damp shower wall, so it fails within months. Cut out the old bead, let it dry, and reseal clean.
- Treating grout cracks as cosmetic. Every crack is a water path. In a Sunnyvale shower, an open grout line runs water straight behind the tile.
- Skipping the post-rain perimeter walk. This is exactly when drainage problems show themselves, and it’s the check homeowners skip most.
- Judging a roof by the shingles only. Flashing, not shingles, is where most leaks start. The chimney and vents are the first place to look.
- Assuming a hollow tap is just old tile. A hollow tile in a wet area has detached from its adhesive and is letting water in. It’s a fail, not cosmetic wear.
- Waiting for visible water before calling anyone. Water damage is usually well advanced by the time you can see it. The tap test and the softness test catch it earlier.
- Doing the contractor-level checks yourself. Roof climbing, structural changes, and anything behind a wall are where homeowners get hurt or make a repair more expensive. Do the cheap checks; call for the deep ones.
When to Call a Professional
Call a professional when a check fails at the contractor level, and don’t wait for it to get worse. Specific scenarios: any hollow tile in a shower, any softness in a cabinet floor under a sink, any attic water stain, any gutter that discharges against the foundation, or any caulk failure that has been open for more than one season. Those are not cosmetic items – they’re the entry points to substrate and subfloor damage. If a repair needs a permit, it also needs a licensed contractor, and you should not be doing that work yourself.
The routine checks are yours. The deep ones are where a trained eye saves you a remodeling bill. Penhallow Remodeling Sunnyvale offers free estimates in Sunnyvale – call (888) 426-8719 to schedule one. Every estimate comes with a written price before any work starts, a defined arrival window, and our written 365-Day Done Right Promise, so if a covered repair fails inside the first year, we come back and make it right at no charge. Our technicians have up to 22 years of experience, arrive background-checked and in uniform, and a live person answers the phone whenever you call.
Frequently Asked Questions
Every two to three months is ideal, and resealing the whole joint every one to two years is the safe target in Sunnyvale’s climate. Dry summers open sealant cracks and the winter rain finds them, so a spring check and a fall check keep you ahead of the water. If you see a gap, peel, or dark line at any check, cut it out and reseal rather than wait for a soft spot to appear underneath.
A hollow tile has come loose from the thinset adhesive layer behind it, and tapping it gives a buzzing sound instead of a solid click. It matters because a loose tile lets water past the surface and against the substrate, which then breaks down and leads to a full tear-out. If you find a hollow tile in a shower or wet-area floor, have it looked at before the next big rain.
Yes. Sunnyvale’s dry, hot summers shrink and crack sealant around windows, doors, and bathing areas more aggressively than the national schedules tend to account for, and the winter rain then drives water into those openings. That’s why the schedule here puts exterior sealant checks in summer and fall, not just a single annual pass. It’s a climate-driven adjustment, and it’s the difference between catching a cracked joint early and finding it six months later behind a wall.
Never do roof-surface inspection, anything requiring height work, structural changes, or any repair that needs a permit. Those are where homeowners get hurt or turn a small repair into a large one. Stick to the look, feel, and listen checks – caulk, toilet base, cabinet floors, tap tests, drawer drag – and call a professional for anything that opens a wall or a roofline.
Typical ranges: resealing a shower or tub joint runs about $150 – $350 with a professional, regrouting a shower about $400 – $1,200, and roof micro-repairs like flashing resealing about $300 – $900. The expensive outcomes – subfloor replacement or a water-damaged tile surround – run into the thousands. Call (888) 426-8719 for a written price on anything specific to your home; estimates are free.
Not with us. The written price you receive before any work begins is the number on the invoice, and it includes the defined scope we agree to. If the work fails inside our 365-Day Done Right Promise period, we return and fix it at no charge and no service-call fee. Call (888) 426-8719 to schedule your free estimate and see the written price before you commit.
The Bottom Line
A maintenance schedule is the cheapest remodeling prevention there is. Check plumbing and caulk quarterly, roof and drainage before the rainy season, tile with the tap test every quarter, and cabinetry and hardware twice a year. In Sunnyvale, the two checks that matter most are sealing against the dry summer and catching water intrusion before the first winter rain, because that’s this climate’s failure pattern. Keep the one-page checklist, honor the pass/fail lines, and call a professional the moment a fail lands at the contractor level. The small repair today is the remodeling bill you don’t pay next year.
Written by the team at Penhallow Remodeling Sunnyvale.
See the difference
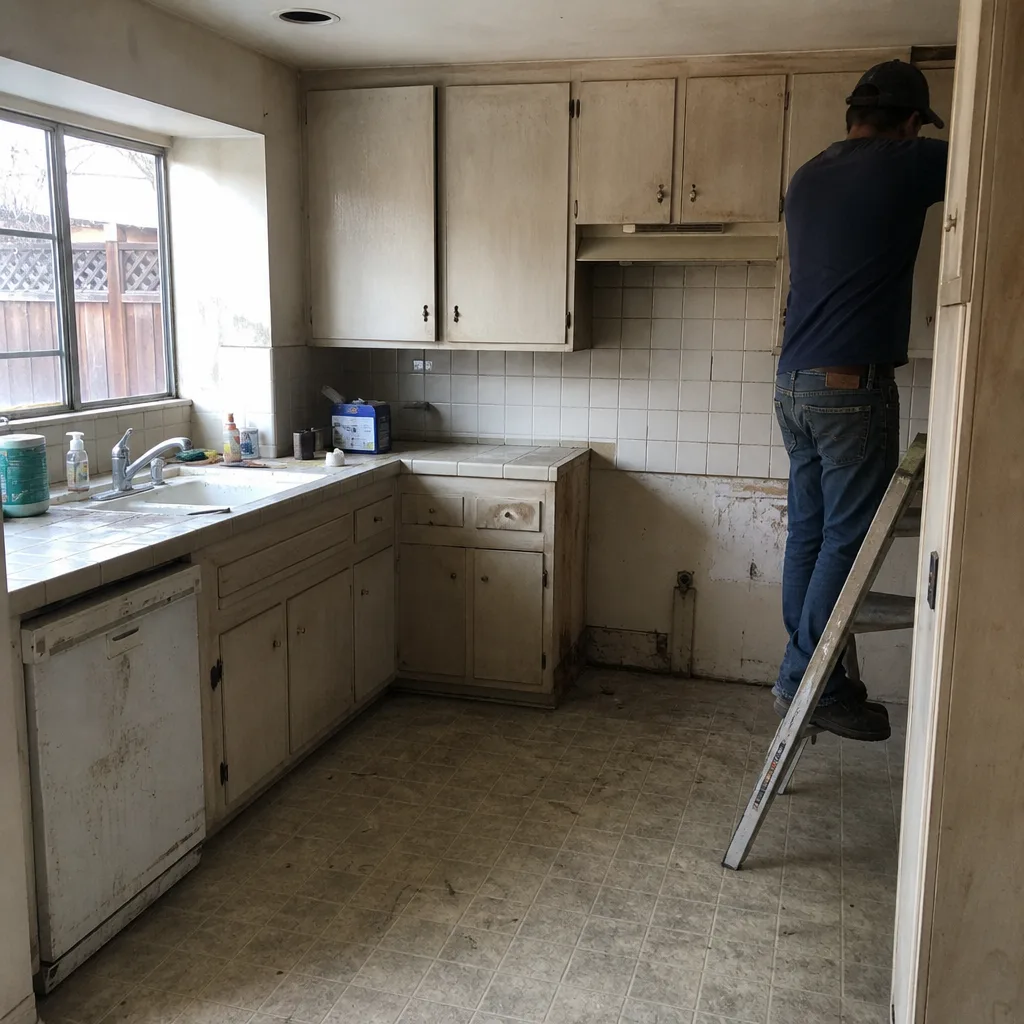 Before
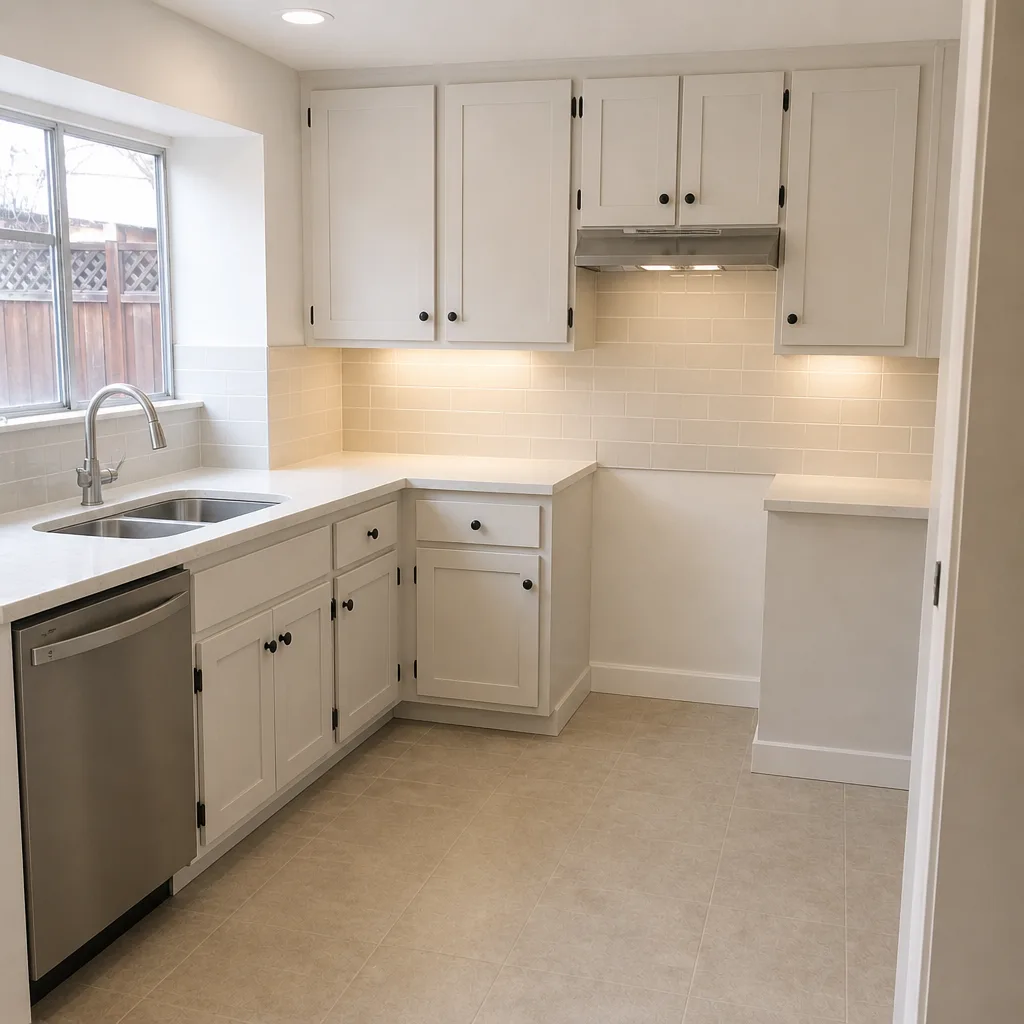 After
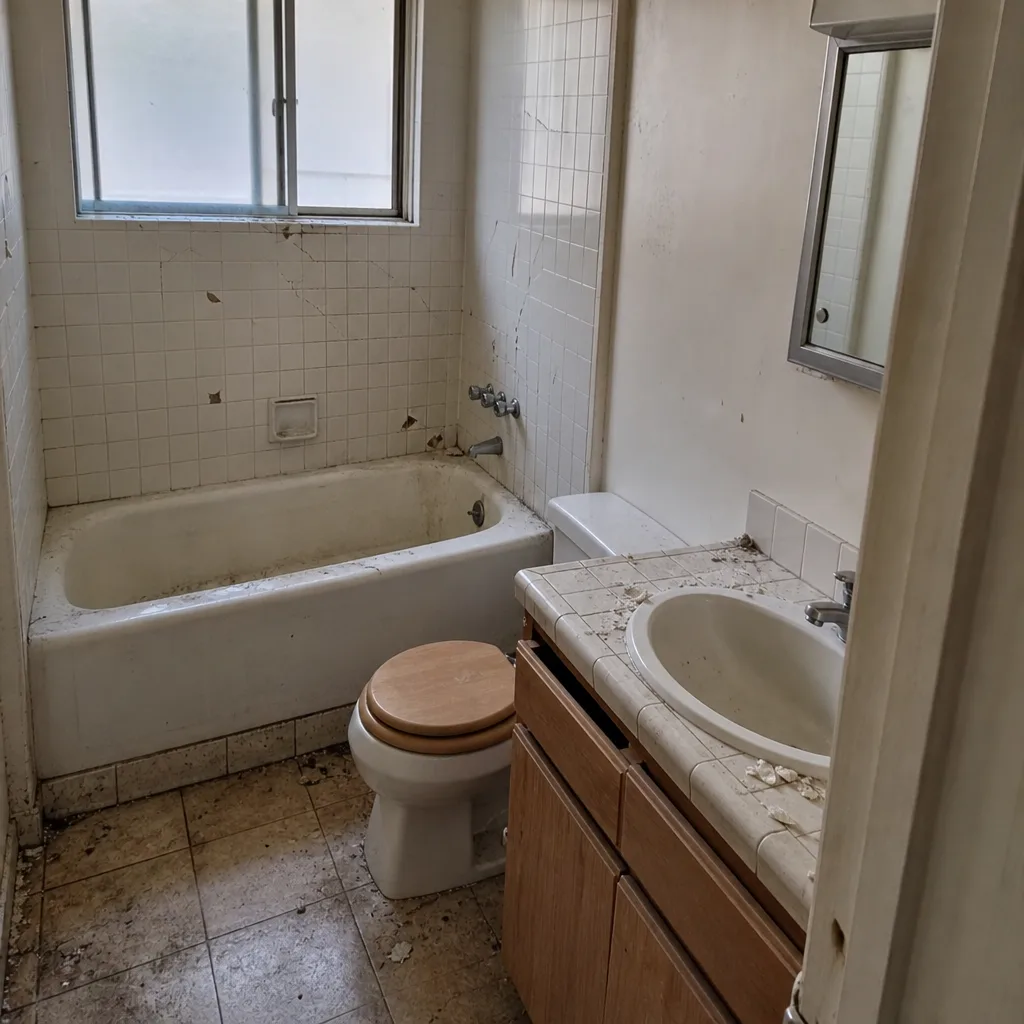 Before
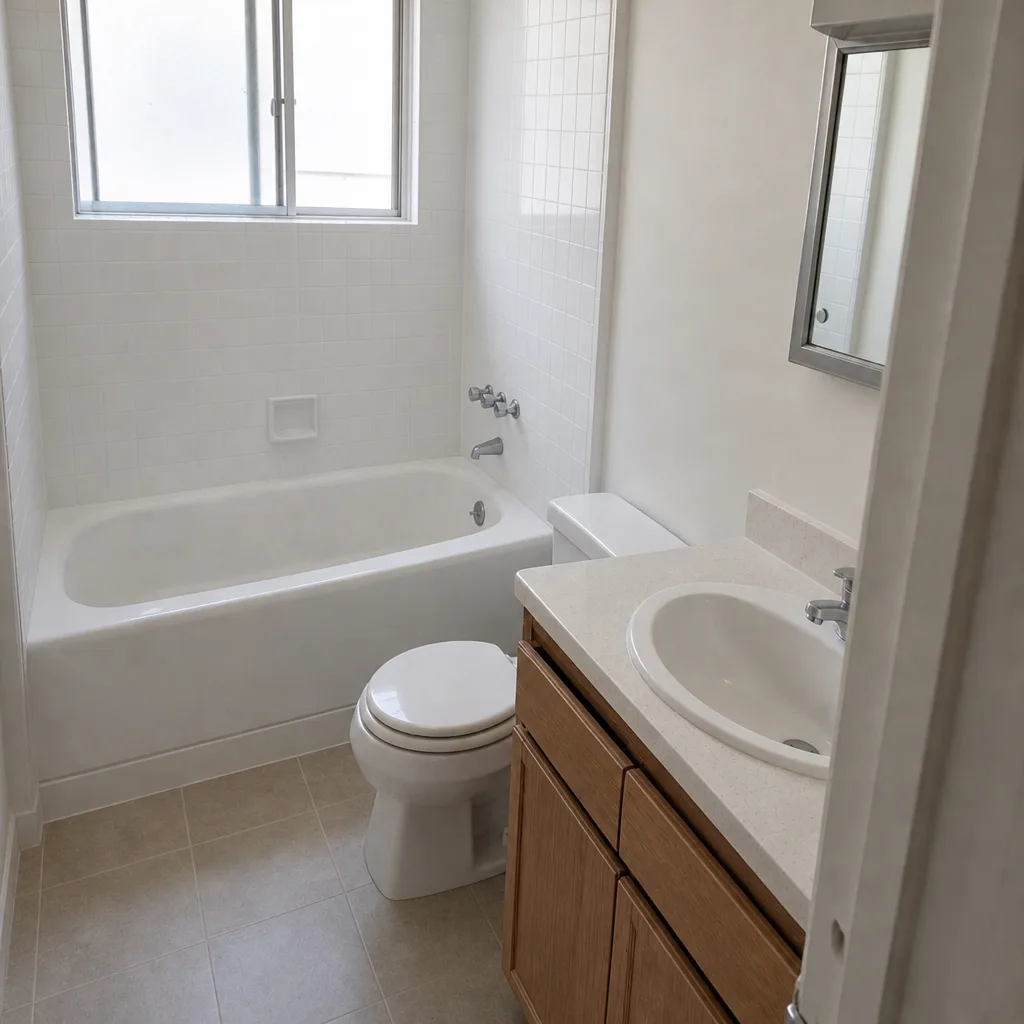 After
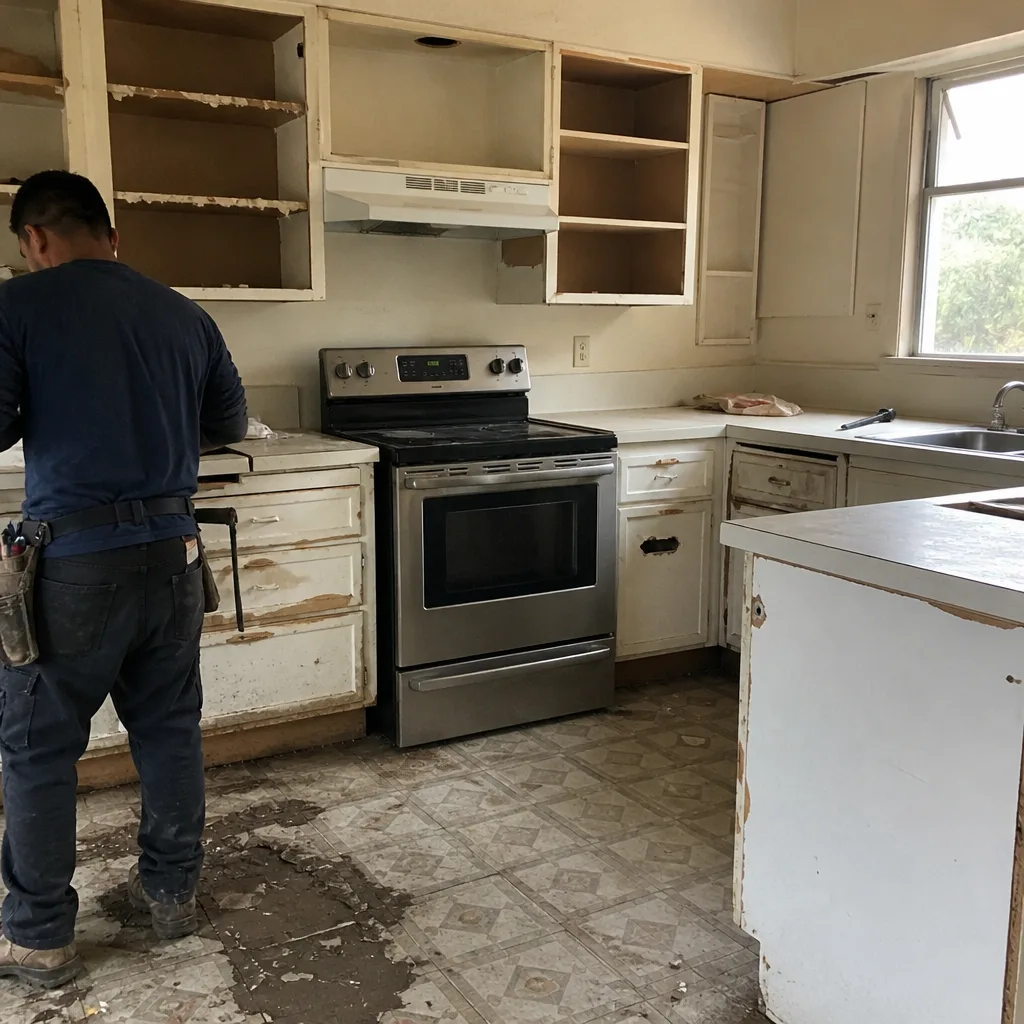 Before
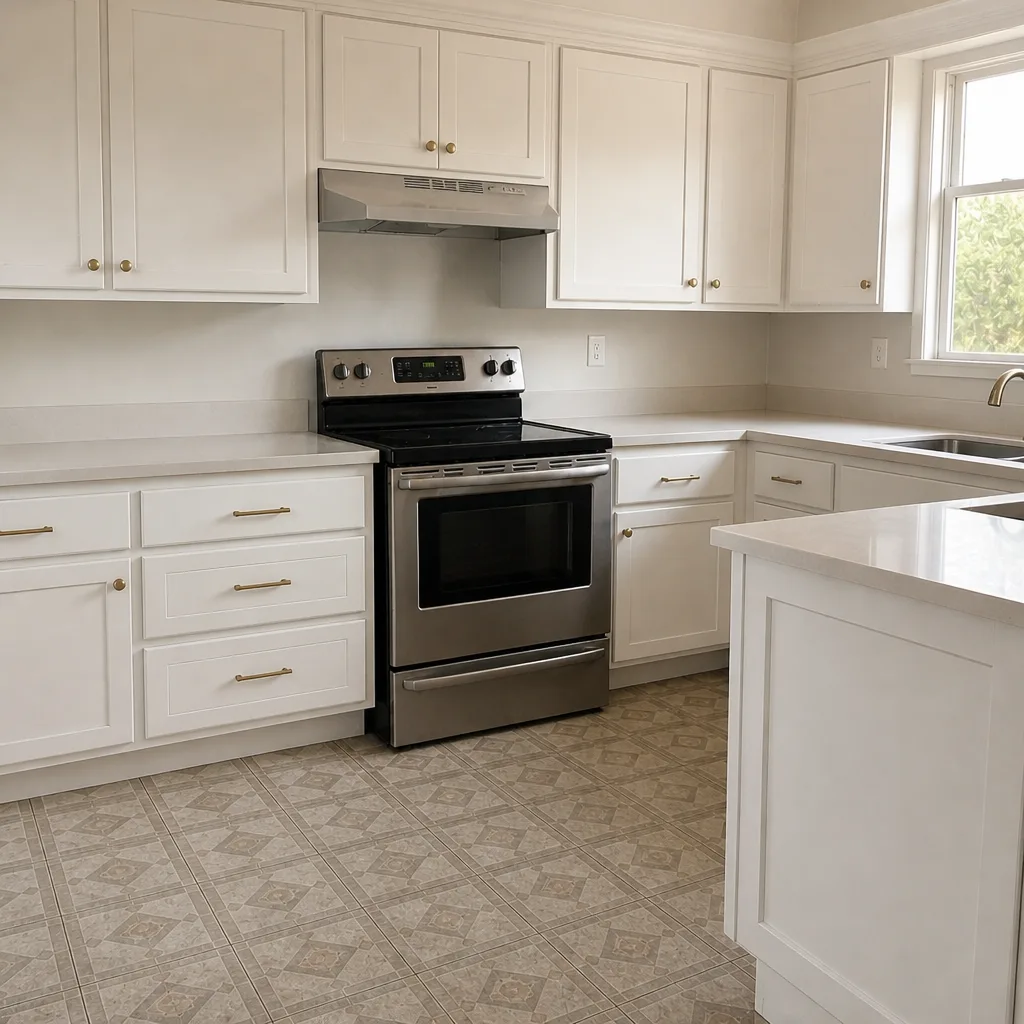 After